How to Install 1mm Natural Stone Panels
How to Install 1mm Natural Stone Panels with a Fibre Backing is straightforward once you treat them more like a flexible laminate than traditional stone. The key is choosing the right adhesive and ensuring a well-prepared surface.
Here’s a complete, professional guide:
Surface Preparation (Most Important Step)
No matter where you’re installing - walls, doors, ceilings - this step determines success. Surfaces must be:- Clean (no dust, grease, or loose paint)
- Dry
- Flat and stable
- Slightly porous or keyed (or primed if not)
- Plasterboard
- MDF / plywood
- Painted walls (lightly sand first)
- Tiles (prime first)
- Concrete/render
Adhesives to Use
Best All-Round Option: High grab flexible adhesive (MS Polymer / Hybrid adhesive)- Strong initial grab
- Flexible (important for thin panels)
- Works on most surfaces
- Contact adhesive (for instant bond, especially on doors)
- PU adhesive (very strong, but less forgiving)
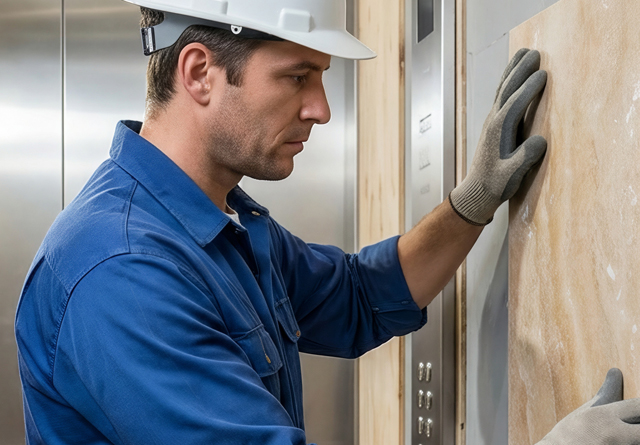
Installing on Walls
Method: Apply adhesive in:- Vertical beads or
- Full spread using notched trowel (best for large panels)
- Position the panel carefully
- Press firmly from centre outward
- Use a roller to remove air pockets
- Leave small expansion gaps (1–2mm)
- Use temporary support if needed (especially large panels)
Installing on Doors and Furniture
Best Method: Contact Adhesive Apply adhesive to:- Back of panel
- Surface (door/MDF)
- Let it go tacky (very important)
- Carefully align and press—no repositioning
- Use a roller for full contact
- Kitchen doors
- Wardrobes
- Feature panels
Installing on Ceilings
Ceilings need extra care due to gravity. Recommended:- Use high grab adhesive
- Apply full coverage (not just beads)
- Props
- Battens
- Or masking tape + bracing
Backlit / Translucent Panels
Important:- Apply adhesive in a way that won’t block light unevenly
- Full spread with a fine notched trowel
- Or use a translucent adhesive
Common Mistakes to Avoid
- Uneven adhesive → causes visible bumps
- Not supporting panels → leads to slipping
- Installing on dusty/unstable surfaces
- Using tile adhesive (too rigid & heavy)
- No expansion gap
- Finishing Touches
- Use trims for clean edges
- Seal joints if needed
- Light sanding on edges for perfect finish
Key Takeaway
These panels are:- Lightweight
- Flexible
- Quick to install